Back to Blog
How to Make a Perler Bead Pattern (Step-by-Step Guide)
Pixelbeads Studio / March 2, 2026

Pixelbeads Studio / March 2, 2026
If you have ever looked at your favorite character art and thought, "I want to turn this into beads," this guide is for you. The short answer to how to make a perler bead pattern is simple: pick the right image, convert it to a pixel grid, reduce colors, then clean up the pattern before you place your first bead.
In this guide, you will learn exactly how to make a perler bead pattern from a picture, even if you are a beginner. You will also learn how to improve auto-generated patterns so your final piece looks cleaner after ironing and is easier to finish in real life.
Contents Part 1: Choose the Right Picture (So the Pattern Actually Works) Part 2: Use the Tools That Match Your Skill Level Part 3: Create a Perler Bead Pattern from a Picture Step by Step Part 4: Common Problems and Quick Fixes Part 5: Related FAQs Part 6: Conclusion
The picture you start with matters more than most people think. A clean source image reduces weird dark outlines and helps the conversion keep the important shapes. If you choose well upfront, you spend less time fixing the pattern later.
Good beginner choices include cartoon characters with clean lines, logos, simple pet photos with plain backgrounds, or a single object on a solid color. A common mistake is using a busy group photo or a dark low-light selfie. Those usually convert into thick outlines, broken edges, and muddy shading.
If you feel stuck, pick “simple and clear” instead of “cool and complex.” A good beginner image is one where you can still recognize the subject even after some detail is removed, because bead patterns always simplify information.
There are three common ways to make patterns, and each method fits a different type of project and workflow.
Manual editing in pixel-art software gives full control over every square and every color decision. It is great when you want to design original art or tune every detail by hand. The tradeoff is time: you will spend more effort on palette building, counting, and layout planning.
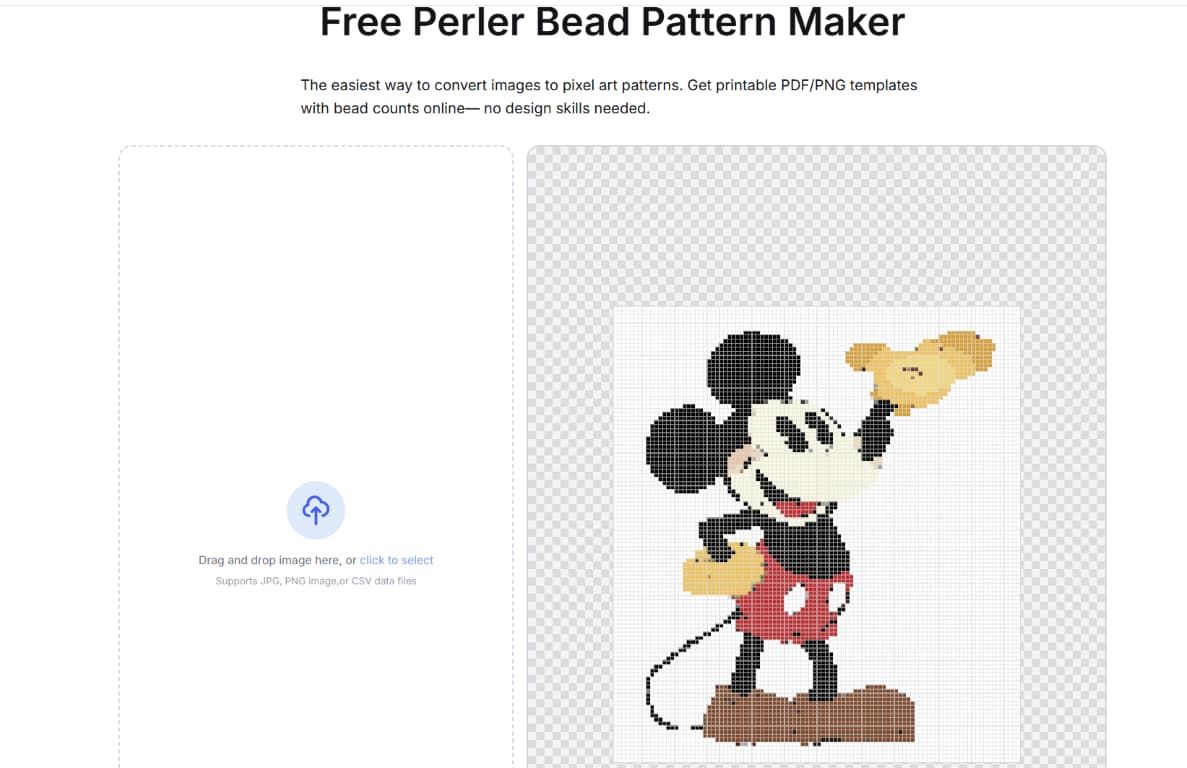
Online converters are faster for beginners because they handle the grid and base palette in one flow.
Pixelbeads’s Perler bead pattern maker is useful when you want a repeatable “photo-to-buildable-pattern" workflow with quick color merging, dark-outline cleanup, brand-palette matching, bead counts, and export templates without manual math.
Phone apps are convenient for quick tests, but editing can feel cramped when you need careful color merging or multi-board planning. Some apps also make it harder to keep a clean brand-based palette for real bead inventory.
A fair way to choose:
If you want the shortest path from “picture” to “ready to build,” start with a simple image, keep your palette small, and export a clear template with bead counts before you place your first bead.
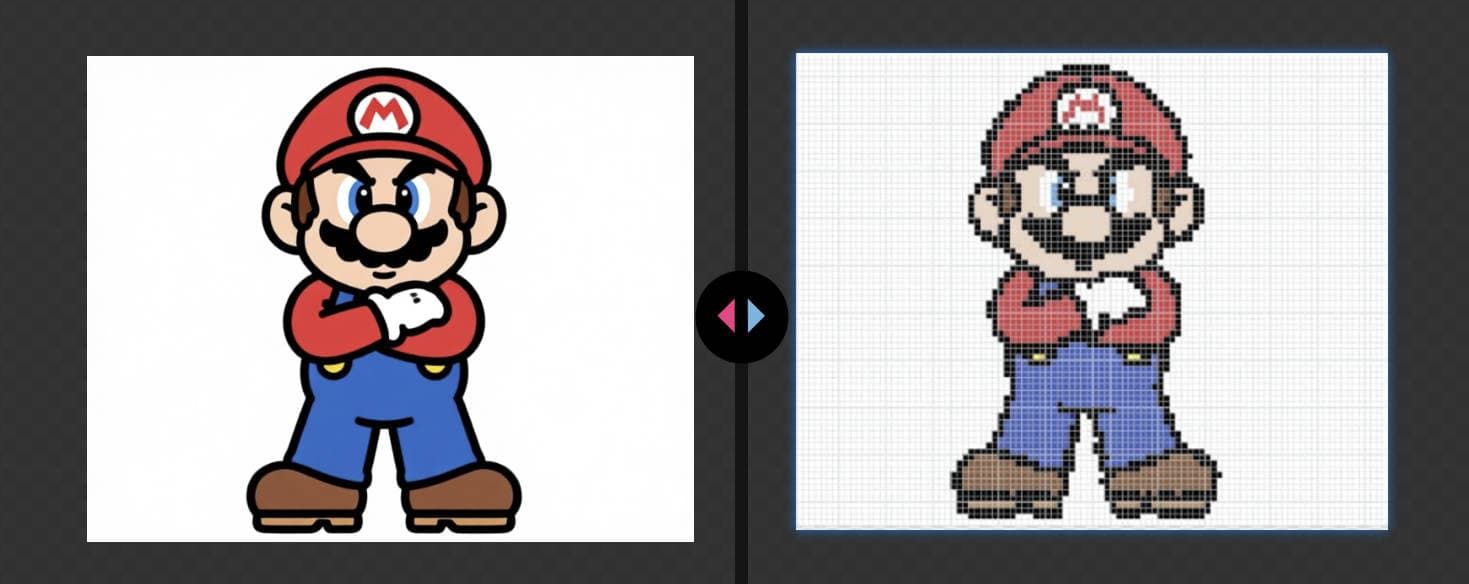
Upload your JPG or PNG image to Pixelbeads. Once it appears in the editor, focus on three settings first: grid size, color count, and readability. Do not chase perfection in the first pass. Your goal is to generate a workable draft, then improve it in short rounds.
Grid size controls both detail and effort. If the grid is too small, facial features and outlines collapse. If it is too large, bead count and completion time rise quickly. Moderate sizes are usually best for beginners because they preserve shape while staying realistic to finish.
Practical size guide:
If you plan to use 29x29 pegboards, choose widths that divide cleanly into board sections. This saves layout trouble later.
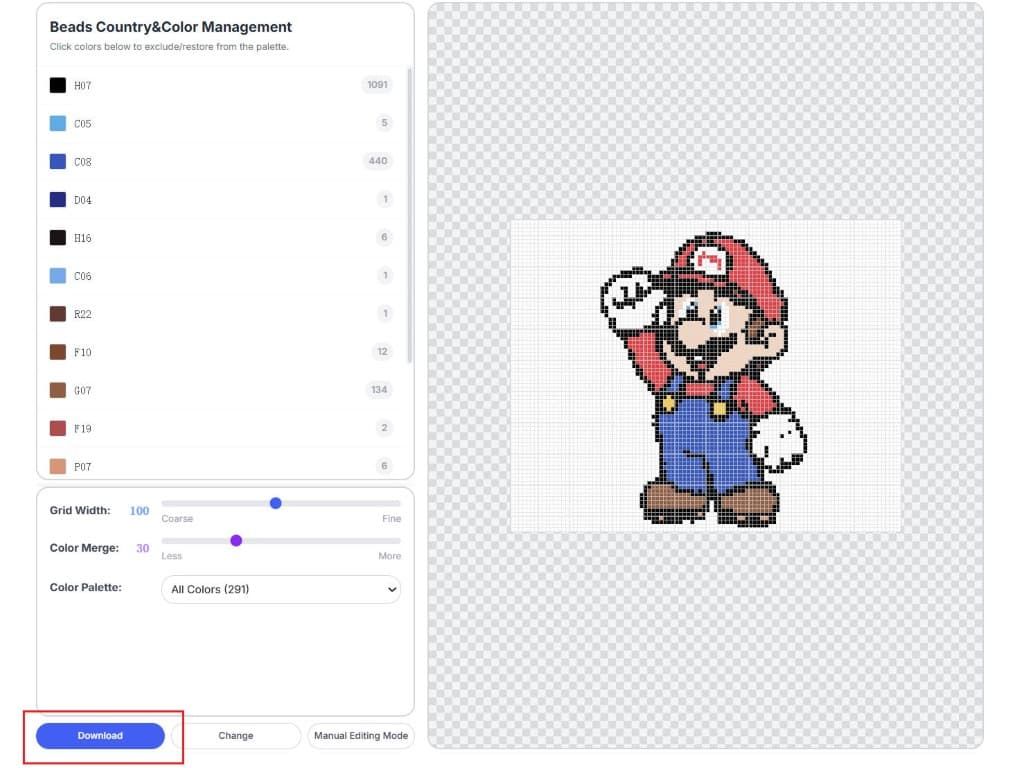
Color simplification is where most time savings happen. Pixelbeads can merge similar shades quickly so you do not have to hand-edit every tiny variation.
Use this checkpoint:
In most cases, fewer colors produce a cleaner finished result as long as the main shapes remain readable.
Auto-conversion gives speed, but manual refinement gives quality. Start with the biggest visual problems first. Batch-replace noisy background colors to clean large areas quickly, then spot-correct individual beads around eyes, mouths, corners, and line breaks.
Do one final zoomed-out check before exporting. If the design only looks good when zoomed in, it usually needs fewer colors, a cleaner source image, or a slightly larger grid.
Once the pattern is clean, click the "Download" button to export a printable template with color codes and bead counts per color. This lets you build without keeping your phone screen on the whole time.
Before placing beads, compare required colors with your physical inventory. Digital color matching is approximate, so plan substitutions early instead of mid-project.
Estimate effort before you start. Project size, color count, and layout complexity all affect completion time. For first custom designs, a smaller finished piece is better than an oversized unfinished one.
During placement, use a stable sequence: outlines first, large regions second, details last. Check your reference every few rows. For ironing, use consistent medium heat, keep movement even, and avoid over-fusing too fast. For larger builds, use a method that helps reduce pegboard stress and alignment shift.
Most weak results come from the same mistakes. If your design looks noisy, reduce palette complexity. If details disappear, increase or rebalance grid size. If the image feels flat, improve contrast before conversion. If edges look broken, rebuild key outlines manually.
Another common issue is scale mismatch. Many beginners pick very large projects because previews look impressive, then lose momentum halfway. Choose a size you can finish this week. Consistent completion builds skill faster than repeatedly restarting oversized designs.
Remember that bead palettes are finite. You will not always get an exact physical match for every digital shade. Prioritize readable contrast and clean forms over perfect realism. In bead art, clear structure usually matters more than subtle gradient fidelity.
Start from a clear image or simple concept, convert it to a pixel grid, limit colors, then clean up important details before building.
You can draw pixel art manually or convert images and edit them. Most beginners get better results faster with conversion plus cleanup.
Use a free image-to-pattern tool, upload your image, set size and colors, generate a draft, refine it, then export for crafting.
For many beginners, moderate pattern widths work best because they preserve shape while keeping bead count practical.
Start with a controlled palette and increase only when needed. Fewer colors usually create cleaner, easier-to-build results.
Yes. Use smaller grids and simplify details aggressively so the design remains clear at a tiny physical size.
This usually happens because of low-contrast source images, too-small grids, or too many similar tones. Improve source clarity, simplify the palette, and check recognition from a zoomed-out view.
This happens when the source image has strong shadows, grain noise, or heavy compression. The converter reads dark noise as edges, especially around faces, hair, and high-contrast borders.
Use a brighter and cleaner image when possible. Light denoise or smoothing can help because small speckles often become scattered, dark beads. If outlines are still too heavy, reduce palette size and reconvert. If you want outlines, add one dark outline color intentionally at the end instead of fighting accidental ones.
This usually happens when color quantities are estimated by guess. Before building, check bead counts per color and convert them into a simple shopping list. Keep one brand palette when possible so replacement colors melt similarly and look consistent.
For high-usage colors such as backgrounds or outlines, add a buffer for mistakes and rework. If your tool provides counts, use them as baseline and round up key colors before you start.
To master how to make a perler bead pattern, focus on decisions before bead placement: image quality, size, palette, and cleanup. The workflow is straightforward and repeatable: choose an image, convert it, resize, simplify colors, refine pixels, export, then craft.
This method works for keychains, gifts, character art, and larger display pieces. For the best beginner experience, complete one small-to-medium project end-to-end first. If you want a fast and practical conversion workflow, Pixelbeads helps you turn an image into a buildable pattern and refine it into a cleaner final result.