Back to Blog
Bring Hello Kitty Island Adventure to Life with Pixel Beads
Pixelbeads Studio / May 20, 2026

Pixelbeads Studio / May 20, 2026
If you or your kids have been glued to an iPad lately, chances are you've been exploring the cozy, magical world of Hello Kitty Island Adventure.
It's the perfect game: exploring a tropical island, decorating cabins, and giving gifts to your favorite Sanrio friends. But what happens when the screen turns off? You can keep the fun going by turning your favorite characters into pixel art patterns and bringing that island magic into the real world.
Today, we are combining the digital fun of the game with the hands-on creativity of pixel beads. Whether you want to make a cute gift for a friend (just like in the game!) or create your own collection of Hello Kitty pixel beads for kids, this guide is your ticket to a real-life island adventure.
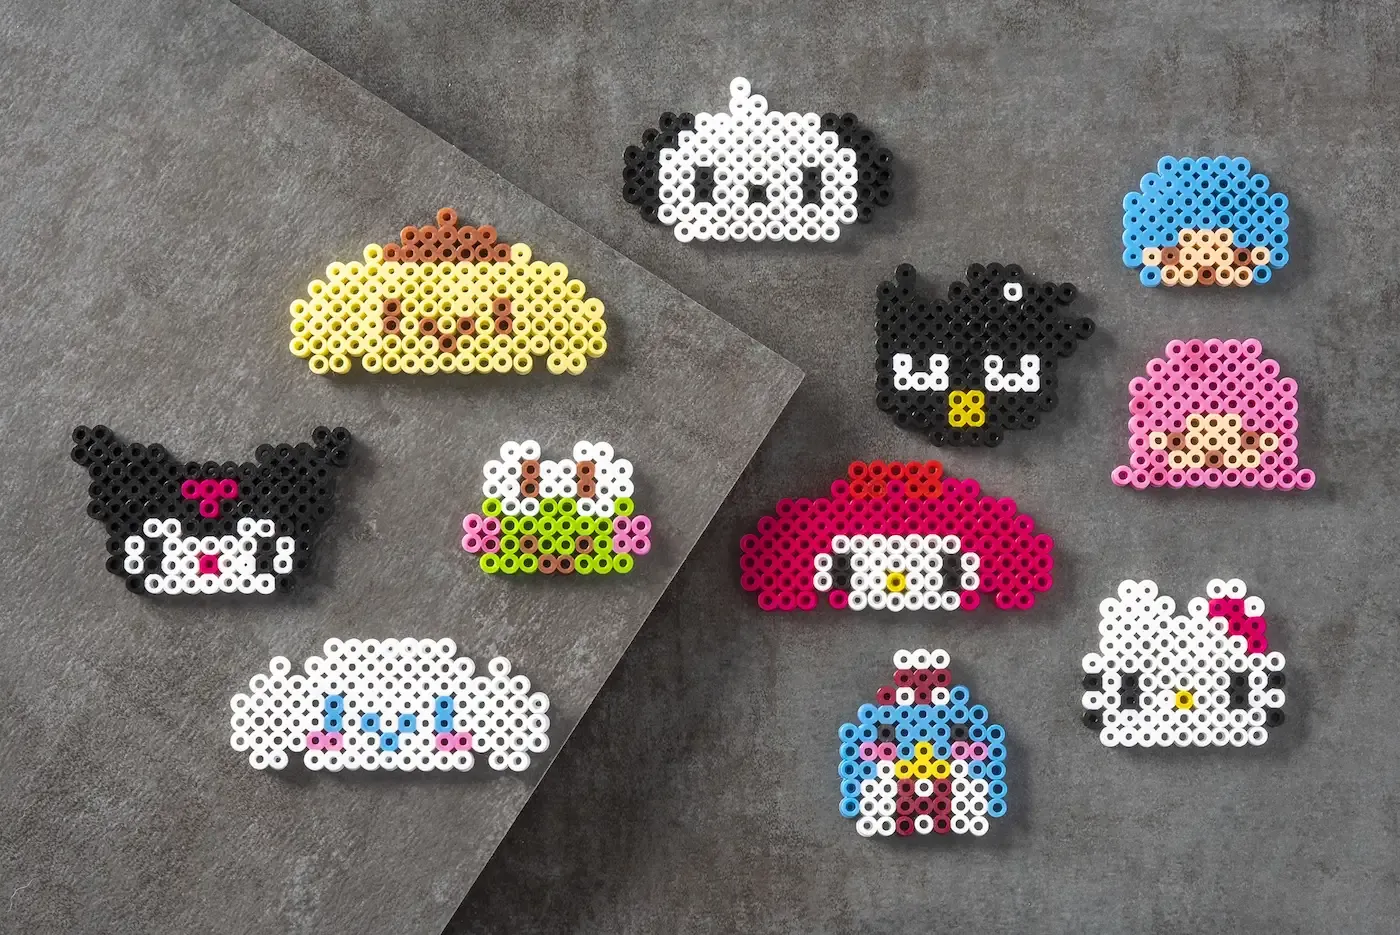
If you look closely at the characters in Hello Kitty Island Adventure, you'll notice something great for crafters: Big heads, simple shapes, and bold colors. Unlike complex anime characters, Sanrio designs are practically made for pixel art.
The game is full of adorable characters. Instead of just making a generic cat, you can recreate the specific "Island" vibes.
Here is a breakdown of the most popular characters to build and the bead colors you’ll need to raid from your stash:
| Character | Key Colors Needed | Vibe / Accessory Idea |
|---|---|---|
| Hello Kitty | White, Red (Bow), Blue (Overalls) | The classic. Use a yellow bead for the nose! |
| My Melody | Pink, White, Yellow | Make her holding a strawberry or a flower. |
| Kuromi | Black, White, Purple (Skull) | The fan favorite. Great for a "spooky cute" look. |
| Cinnamoroll | White, Light Blue (Eyes/Tail) | Use glow-in-the-dark white beads for a magical effect. |
| Chococat | Black, Cream, Blue (Collar) | Don't forget his long whiskers! |
| Keroppi | Green, White, Pink (Cheeks) | Perfect for using up those leftover green Christmas beads. |
This is the coolest part. You don't need to search Google for "Kuromi pattern" and hope for the best. You can literally take your favorite moment from the game and build it.
Did you unlock a cute new Mermaid outfit for Hello Kitty? Or find a funny pose for Gudetama?
Here is how to turn your game into a pattern:
When making Hello Kitty pixel beads for kids, there is one common problem:
The Ears and Whiskers.
Sanrio characters often have sticky-outy bits (like Cinnamoroll’s long ears or Hello Kitty’s whiskers). These fragile parts can easily snap off if you aren't careful.
Safety Tips for a Stronger Build:
In Hello Kitty Island Adventure, a huge part of the game is giving gifts to increase friendship levels (Hearts). You can do this in real life too!
Don't just leave your creations sitting in a drawer. Turn them into functional items:
You don't have to leave the island behind when you put down the controller. Crafting with sanrio perler beads is a fantastic way to extend the fun of the game. It gets kids off screens, improves their focus, and gives them a tangible reward for their creativity. So grab your white and pink beads, fire up our pixel art converter, and start building your own Sanrio squad today.
The cuteness of Sanrio isn't limited to plastic beads. If you want to stitch a Hello Kitty on a tote bag or a pillow, the grid pattern works exactly the same! Use a cross stitch pattern generator to turn those same game screenshots into adorable embroidery projects. Create Your Hello Kitty Pattern Now and let the island adventure continue!